A snap-fit model kit is the best value in this hobby, and most people build them wrong. They twist parts off the runner, they leave a white stress mark where the gate used to be, they squeeze a seam shut with their thumbs, and then they blame the plastic. I have built enough of these to know the plastic was usually fine. The hands were the problem.
A snap-fit model kit is designed so that glue is optional, paint is optional, and tools are optional. Optional is not the same as unnecessary. A pair of flush nippers and a sanding sponge turn a kit that looks assembled into a kit that looks built, and that difference is visible from three feet away.
What follows is the workflow I run on every kit, the two kits I would hand a beginner first, and the places where a clean build quietly goes wrong.
Why you should trust me
I built my first Gundam kit at 11 and never stopped. That is 15 years of Gunpla and 10 years of airbrushing, funded by an IT job and a backlog that will outlive me. I test every kit the same way: a full build with no aftermarket parts, a part-fit scorecard, and a seam line honesty check. I have judged local Gunpla competitions twice, which taught me that every kit is somebody's first kit, so I score on engineering rather than taste.
My rules are simple and they have not changed. Part fit is the soul of a kit, and a kit that needs glue where it should not is a bad kit no matter how good the details are. Seam lines are the honesty test. Grade is not quality, and a great HG beats a mediocre MG every time. The box art is marketing. The sprue is the truth.
How I picked and how I tested
The two kits below are not kits I have published a full build scorecard on yet, so I am not going to pretend otherwise. What I can tell you is exactly what I check, because the criteria matter more than my opinion of any single release.
Four questions drive every scorecard I keep. Does it fit without glue? Snap-fit is the standard, not a bonus. Where are the gates? Gates on a visible surface mean extra sanding work you did not sign up for. Are the decals usable? Decal quality is engineering, and waterslides that shatter in warm water are a design failure, not a user error. And would I build it again for fun? That is the test that no spec sheet passes for you.
For this guide I looked at what each listing actually claims, whether the design supports those claims, and how much cleanup the build will demand from someone who owns nothing but the box. Both kits below are designed around assembly without glue, and neither requires paint to look finished. That puts them in the same category I score every kit in, which is why they are here.
What "no tools, no glue" actually means in practice
Read the claim carefully, because it usually means less than beginners think and more than skeptics assume.
No glue means the joints are engineered to hold. Pegs, polycaps, and friction-fit collars do the work, and the kit should stay together under handling, not just on a shelf. No paint means the plastic is molded in separate colors so the color separation is built into the parts. No cutting usually means the gates are thin enough that a part twists free by hand, and no tools means the kit does not require a hobby knife to seat anything.
Where this breaks down is cleanup. Twisting a part free leaves a nub, and a nub is the first thing a viewer notices on an otherwise clean build. You can fix that with a fingernail and a sanding sponge, which is not the same as a full toolbench, but it is not nothing either. Under-gates, where the gate sits hidden under the part, are the mark of good engineering and they make this step almost free.
The two kits that reward a clean build
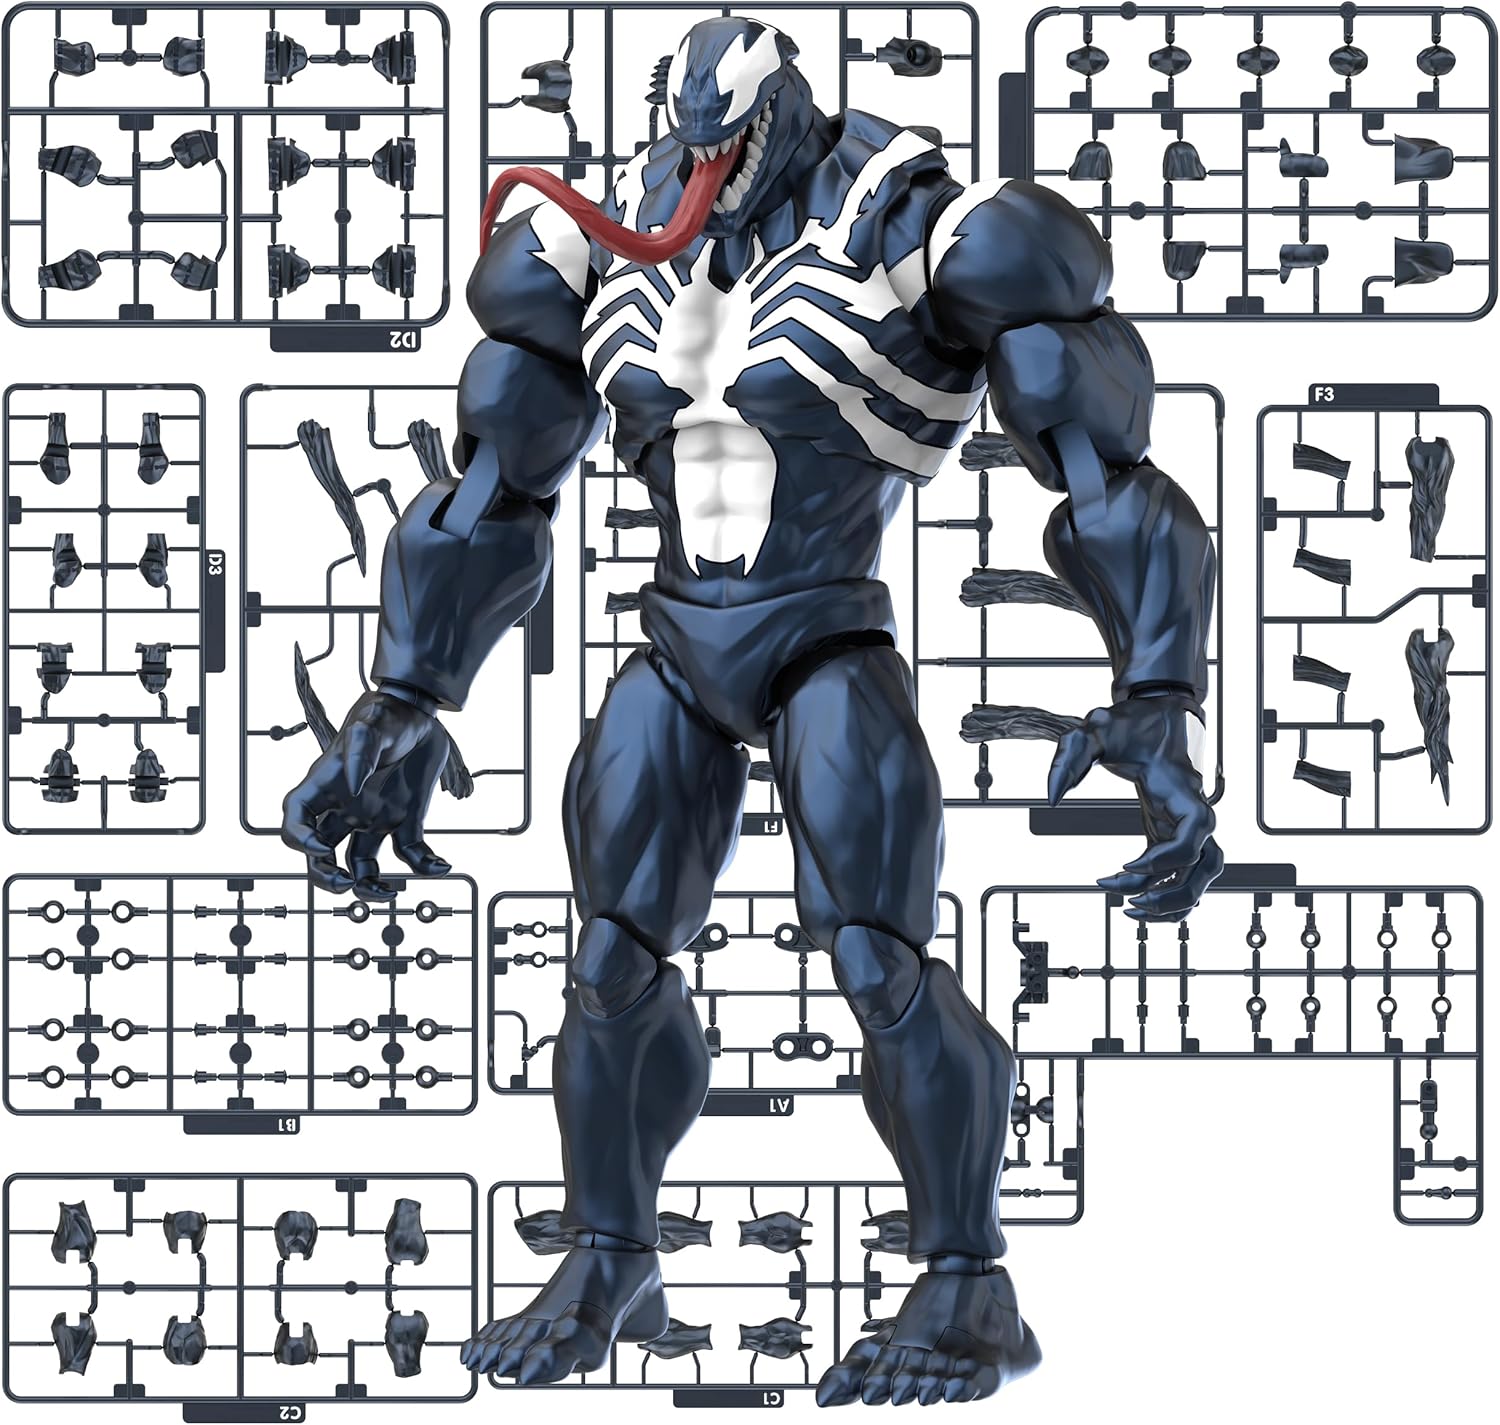
Start here: BLOKEES Champion Class - Marvel Rivals - Venom - 185 Pieces Model Kit - 6 Inch - 90 Points of Articulation - Assembly Required - No Tools - No Cutting - No Glue - No Paint - Age 14+
 Visit on Amazon →
This is the kit I would put in front of someone who has never snapped two pieces of polystyrene together. It is 185 pieces, it stands about 6 inches, and it lists 90 points of articulation, which tells you the design leans hard on joints that have to work without cement. The listing also claims no tools, no cutting, no glue, and no paint, and the age rating is 14 and up.
The reason that matters for a first build is risk. A kit with this many articulation points fails loudly if the joints are sloppy, and it fails just as loudly if you force them. That makes it a good teacher: you learn quickly that a joint which needs pressure is a joint you have not cleaned up yet. The piece count is also small enough that a full build fits in an evening, which means you can make your mistakes somewhere cheap.
What to watch for: 90 points of articulation means 90 chances to over-tighten. Test each joint through its range before you close the surrounding body panels, because once a limb is assembled you lose access to the peg inside it.
This one is for anyone who wants to learn snap-fit assembly on a figure that poses, rather than on a vehicle that just sits there.
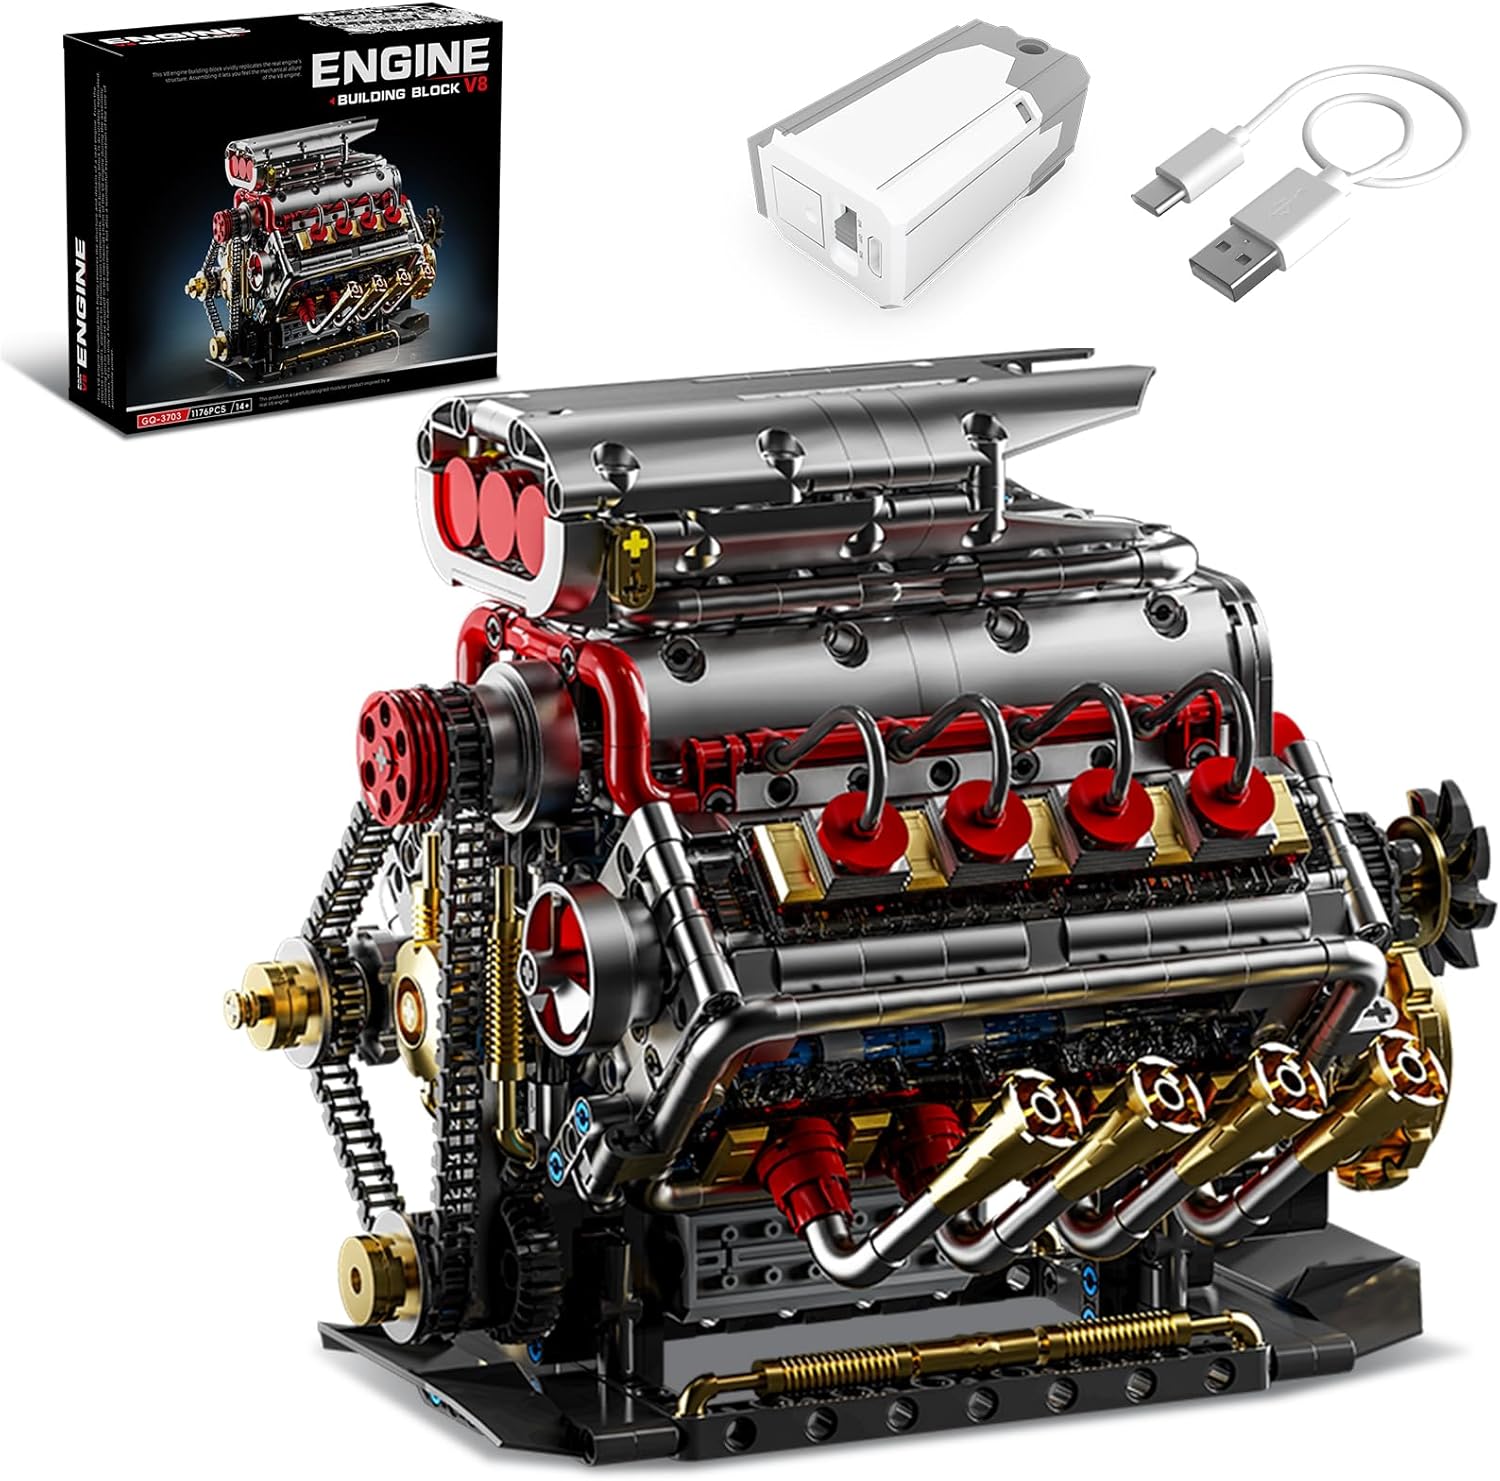
Step up: V8 Engine Model Kit that Runs, 8-Cylinder Car Engine Building Set with Rechargeable Motor, Compatible with Lego for Adults, STEM Engineering Construction Toy for Teens Boys (1176 PCS)
 Visit on Amazon →
At 1,176 pieces this is the step up, and it is a different kind of build. It is a running 8-cylinder engine model with a rechargeable motor, and the listing notes it is compatible with Lego, which means you are working in a brick and peg system rather than a traditional plastic model kit. The target is adults and teens, and it is billed as an engineering construction piece as much as a display model.
Here is why I put it second. Brick systems forgive a lot, because the tolerances are built into the connection points, but they punish impatience in a different way: a single misplaced piece deep in an engine block is invisible until the assembly will not turn over. A model that runs is a model that has to be mechanically correct, not just visually correct. If you can build this one cleanly, you understand sequencing, and sequencing is the whole game.
What to watch for: The rechargeable motor means moving parts, and moving parts find every loose connection. Run the mechanism by hand through a full rotation before you finish the outer shell, and again before you power it up. If something binds, the problem is behind you, not in front of you.
This is the right pick for someone who wants a project with a payoff, and for anyone buying a gift for a teenager who already builds with bricks.
The build workflow, step by step
This works on any snap-fit kit, brick-based or traditional. The steps are in order for a reason.
Step one: Read the runner map and the manual before you cut anything. Lay out the sprues, match them to the manual's part callouts, and read the whole assembly sequence once. Ten minutes here saves an hour of unpicking a joint you closed too early. In a brick kit, this is the moment you sort by bag and by color, and the sorting is not optional at 1,176 pieces.
Step two: Cut, do not twist. If your kit has gates, use flush nippers and leave a hair of the gate on the part. Twisting tears the plastic and leaves a stress mark that no amount of sanding removes, because the damage is under the surface, not on it. If the kit advertises no cutting and no tools, try one part by hand, look at the nub you left, and decide whether you care.
Step three: Sand the nub like you mean it. A sanding sponge at 600 to 800 grit takes the leftover gate down, and a finer pass polishes it. Sand in one direction, not in circles, and check the surface with a raking light from a desk lamp. Raking light is how you find the nub you missed, and it is how a judge finds it too.
Step four: Dry-fit every joint before you seat it. Push the peg in without force and see how it sits. If it stops early, there is a nub, a mold seam, or a gate stub in the way. Fix the cause instead of adding pressure. Force is how pegs snap, and a snapped peg in a no-glue kit is a real problem.
Step five: Test articulation before you close the body. Every kit with joints has at least one place where you assemble a limb and then seal it inside a larger structure. Move that limb through its full range first. Once it is enclosed, you are not adjusting it without disassembly.
Step six: Panel line as you go, not at the end. Panel line ink is the recessed detail that makes a kit pop with one pass, and it is far easier to run before a part is buried inside an assembly. A fine-tip marker or a thinned enamel wash both work. Let it dry before you handle the part, and wipe the excess across the surface rather than into the line.
Step seven: Apply decals last, on clean plastic. Waterslides need a glossy surface and patience. If the kit uses stickers instead, set them with a fingernail or a cotton bud so they sit in the panel line rather than over it. Decals that shatter in warm water are cursed, and there is no technique that saves them, so keep the water lukewarm and work one at a time.
Step eight: Pose it, then leave it alone for a day. Set the pose you want, put the kit on the shelf, and come back the next morning. Any joint that has drifted or any seam that has opened up will show itself. That is your honest grade on the build, and it is the number I would write on the scorecard.
Where most beginners go wrong
The first mistake is twisting parts off the runner. It is fast, it feels fine, and it leaves stress marks that show up under paint and under light.
The second is forcing a joint that does not want to close. In a snap-fit kit, resistance almost always means debris or a mold seam, not a design that needs muscle. Back the part out, look at the peg, clean it, and try again.
The third is panel lining over unwashed plastic and wondering why the ink beads. Mold release and finger oil are real. A quick wipe with warm water and a drop of dish soap, then a full dry, fixes it.
The fourth is sealing a joint before testing the articulation inside it. Test range of motion early, every time.
The fifth is deciding the build is a failure because one nub is visible. It is not. A finished kit with one honest flaw beats an unfinished kit with none.
Kits that are the wrong tool for this job
This workflow is for snap-fit plastic and brick-based assembly, and it does not transfer everywhere.
Resin kits are a different hobby. They need saws, dust protection, superglue, and filler, and they will not snap together no matter how carefully you sand. Old tooling from the big legacy brands is also a separate conversation. Some of it fits like a dream and some of it is a test of your patience, and you cannot tell which one you have until you open the box and look at the gates. Painted miniatures and die-cast collectibles are not assembly projects at all.
If your kit needs glue where the box said no glue, that is a design failure and worth saying out loud in your own notes. It is not a reason to assume you did something wrong.
What this all costs
The real budget here is consumables, not kits. A pair of flush nippers, a sanding sponge or two, a hobby knife, a panel line marker, and a soft brush cover almost every build in this guide, and they last for years. Neither of the two kits above needs paint or cement to look finished, which is where the money usually goes in this hobby.
Check current Amazon price on both listings before you commit, and check what the kit includes in the box, because a kit that ships with its own tools changes the math.
The cost-per-day argument is the same one I make to every beginner. A kit you build over a weekend and keep on a shelf for five years costs very little per day, and the tools you bought for it get used again on the next kit and the one after that. The expensive path is buying a glue-dependent kit as your first build, hating the result, and deciding the hobby is not for you.
Start with something that fits, finish it cleanly, and let the plastic do the work. That is the whole job.