
Every robot car kit build starts the same way. The box looks manageable on the shelf, and then you open it and find a few hundred fasteners in bags sealed by someone who assumed you would sort them yourself. The manual claims eight steps. Your bench says otherwise.
I have been building plastic models since I was eleven, and I still get that knot in my stomach when a build leaves the sprue stage and becomes something that can actually break. The hobby has a name for that feeling. Perfectionism. It is the reason a half-finished project sits on the shelf for a year while you tell yourself you will get back to it when you have more time.
Here is what a few hundred builds taught me. The people who finish are not the ones who never make mistakes. They are the ones who plan for mistakes and keep going. A robot car kit build is the cheapest training for that mindset you can buy, because the stakes are low, the parts are replaceable, and the thing actually drives when you get it right.
Why you should trust me
I am Kenji, 36, out of San Jose. I built my first Gundam kit at eleven, have fifteen years of Gunpla behind me and ten years of airbrushing, and I have judged two local Gunpla competitions. I work in IT to fund a backlog that will outlive me.
I judge every build the same way. Part fit is the soul of a kit, because a build that needs glue where it should not is a bad kit no matter how good the details are. Seam lines are the honesty test, since good engineering hides them. And grade is not quality, because a great HG beats a mediocre MG every single time. Those rules came from plastic models, but they hold on any bench, including a screw-together robot.
How I picked and how I tested
There are two products in this article and they do not get the same scorecard, so let me be straight about how each one earned its place.
For the kit, I judge a build on four things: whether the step order in the manual survives contact with reality, whether the hardware can be sorted without a caliper, whether a mistake is recoverable, and whether the finished thing is worth using after the novelty wears off. Recoverability is the one people skip, and it is the one that decides whether a beginner finishes.
For the book, the test is different. I do not care how it reads on a couch. I care whether it changes what I do at the bench on the night a build goes sideways. A book that only describes the problem fails that test.
One caveat up front: I am not going to quote measurements or torque specs at you from a build I did not document. What follows is the workflow I use on every project, plus the two items I would put in your hands before you start.
What to put on the bench before you start
You cannot build clean on a cluttered bench. Clear the surface, get a tray with a lip so screws do not roll onto the floor, and set up a lamp you can move. That is the whole setup. Everything else is optional.
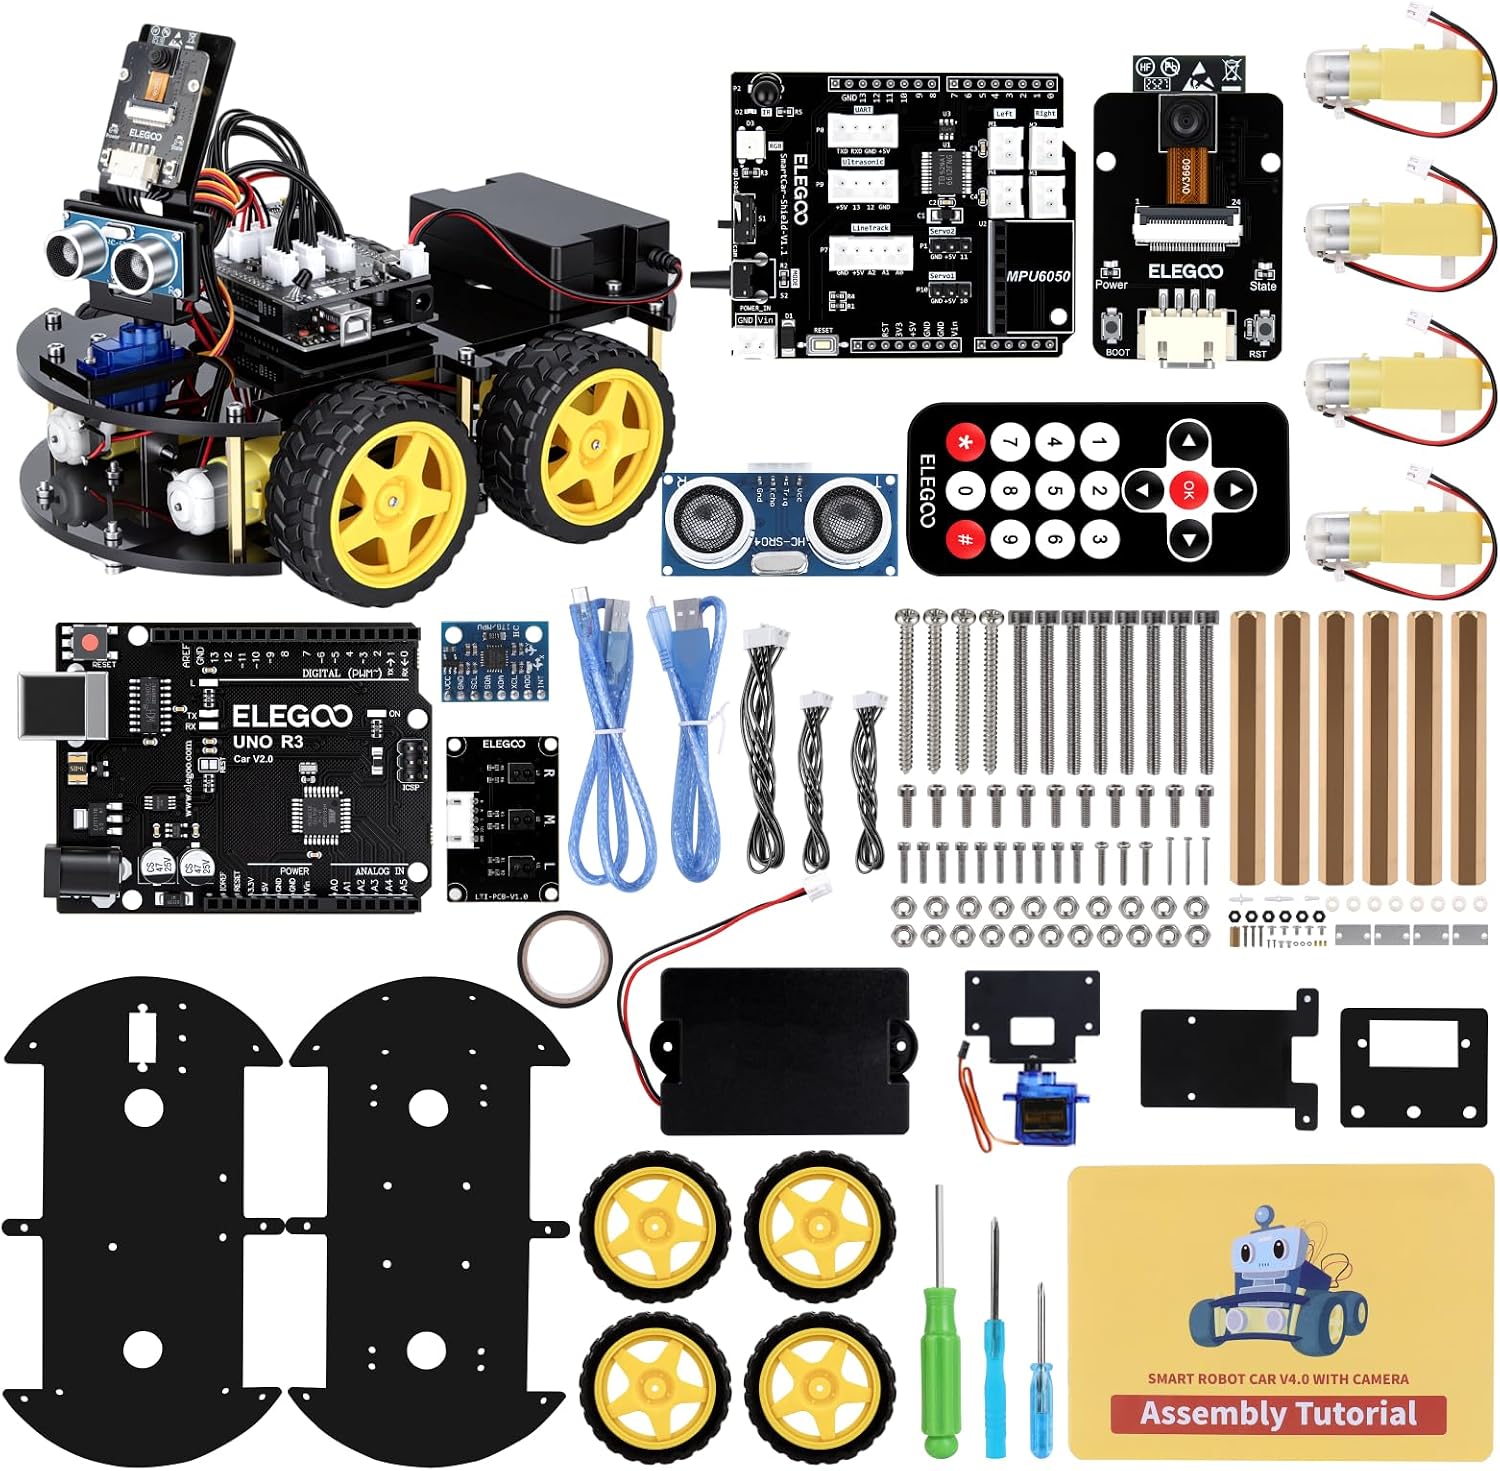
The kit: ELEGOO UNO R3 Smart Robot Car Kit V4 with Camera, Compatible with Arduino
 Visit on Amazon →
This is the kit I point people toward when they want a first build that does something after it is finished. The center of it is an Arduino-compatible UNO R3 board, and that matters more than it sounds. The board is the part you will keep using long after the car is built, and nearly every tutorial, library, and forum answer you will ever search for was written for that board.
This version ships with a camera module, which turns a drive-around project into something you can program to see. That camera is also the honest caveat. It is one more cable to route, one more thing to verify before you close the chassis, and one more place where a rushed step costs you an evening. If you have never touched a microcontroller, expect the first upload to fight you. That is normal and it does not mean you bought the wrong kit.
The chassis is screw-together, and that is the right call for a first build. Nothing is cemented, nothing is permanent, and every mistake can be undone with a driver and five minutes. Compare that to a plastic model where a bad cement joint means putty and sanding, and you can see why I recommend this class of project to anyone who wants to learn recovery instead of fearing error.
Flaws but not dealbreakers: the manual is translated, and translated manuals assume you can tell a six millimeter screw from an eight by eye. You cannot, at eleven at night. Sort first.
The reset: You Will Make Mistakes: Discovering God's Grace in the Midst of Perfectionism
 Visit on Amazon →
This is not a model kit book and it is not a robot book. It is a book about perfectionism, written from a Christian perspective, and the title is the whole argument: you will make mistakes, and the right response to a mistake is grace rather than a self-imposed ban from the bench. I keep it on the shelf next to the kit boxes because the failure mode it describes is exactly the one that kills builds.
Here is what that failure mode looks like in practice. You strip a screw head. You decide the build is ruined. You put the box on the top shelf. Six months later you sell it at a loss. The book's answer is not a technique, it is a posture: expect the error, fix the error, keep building. Whether or not you share the faith it comes from, that reframe is the difference between a finished car and a shelf of unfinished ones.
Flaws but not dealbreakers: if you want a straight technical manual, this is not it. It is the thing that keeps you at the bench when the build gets ugly, and it earns its space for that alone.
The actual build workflow
Now the part you came for. This sequence works on any screw-together electronics kit, and it works because it front-loads the boring steps that save you from redoing the fun ones.
Step one: Inventory before you build. Empty every bag onto the tray and check the parts against the list. A missing part found on night one is an email to the seller. A missing part found on night four is a rebuild. Five minutes now buys you an evening later.
Step two: Read the whole manual once, then start over. Read it end to end without touching a part, then go back to page one and follow it step by step. Manuals in this class are sometimes ordered for assembly convenience rather than for testing convenience, and reading ahead tells you which steps you can safely move earlier.
Step three: Sort the hardware. Muffin tin, tackle box, or a strip of tape with labels. Sort by length and diameter, not by bag. This is the single highest-return step in the whole build, because the moment you are guessing between two similar screws is the moment you cross-thread one.
Step four: Dry-fit the chassis before you tighten anything. Seat every screw a turn or two, check the frame sits flat, then snug them down. Snug, not gorilla. Thin plastic and soft metal strip long before they feel tight, and a stripped screw boss is the one mistake on a chassis that is genuinely annoying to undo.
Step five: Get the electronics talking on the bench, not in the car. Before anything is mounted, connect the board to your computer and confirm it is recognized. Upload the test sketch the kit provides, or a simple blink test, and watch it work. Do not mount a board you have not seen respond yet. Debugging is easier when the part is sitting loose in front of you instead of buried in a chassis.
Step six: Keep the wiring harness short and dressed. Route motor and battery leads away from the wheels, and keep the camera ribbon clear of anything that moves. Zip ties or small clips are enough. A harness that a wheel can snag is a build that fails on the first drive, and it fails in a way that looks like a software problem, which is the worst kind of wrong.
Step seven: Test every subsystem before you close the shell. Motors spin in the right direction. Camera delivers an image. Board still accepts an upload. Only then do you do final assembly. Every subsystem you verify now is one you do not have to disassemble later.
Step eight: Drive it, log what breaks, and fix one thing at a time. Keep a notebook next to the bench. When the car pulls left, write it down and change one variable. Perfectionism wants you to fix everything at once, and that guarantees you learn nothing about which fix worked.
The five mistakes that end most builds
Sorting by eye. Covered above. It is the number one cause of stripped hardware and the easiest to prevent.
Tightening before aligning. Seat everything loose, then snug. Always.
Soldering or wiring with the part mounted. If you have to reach into a chassis to make a connection, you have made the job three times harder and twice as likely to go wrong.
Chasing a clean first build instead of a working one. Your first build is a prototype. Clean comes on the second pass, or on the next kit. A working car with a messy harness beats a beautiful chassis that never moved.
Treating a mistake as a verdict. A stripped screw is a stripped screw. It is not evidence that you are bad at this. The book above exists because that distinction is the whole game.
The competition and why it lost
A bare Arduino board plus a separate chassis, motor driver, and wheels is the other path, and it is a legitimate one. You get more flexibility and you learn more about sourcing parts. What you do not get is a manual, and for a first build the manual is the product. Loose parts are a second or third project, not a first.
A prebuilt RC car is the other tempting shortcut. It drives today. It teaches you nothing about why it drives, and when it breaks you will not know where to look. That is the opposite of what you want from a first project.
If what you actually want is pure technique practice, a modern snap-fit model kit is the better teacher. The current Bandai HG line fits like a dream and needs zero glue, so you can practice clean nub removal and panel lining without any electronics in the way. That is a different skill set though. Today is the build-and-recover guide.
What this all costs
I am not going to quote prices that change by the week. The links above show the live numbers when you click them, and both items sit in the range you would expect for a starter kit and a paperback.
What you actually pay for is the consumables nobody budgets for: a decent screwdriver set with proper sizes, flush cutters, a small multimeter, and a spare hardware assortment. That last one is the real insurance policy. If you own spare metric screws, a stripped head costs you a minute. If you do not, it costs you an evening and some pride.
Then do the honest math on time. A first build is a weekend if you take the steps above in order, and the car keeps working after that weekend. Compare that to the cost of a kit that sits on the shelf because you were afraid to start, and the math stops being close.
The takeaway
The kit is designed to be built by someone who will make mistakes, which is everyone. Sort the hardware, dry-fit before you tighten, test before you mount, and treat each error as a step rather than a verdict. That is the whole method, and it works whether you are building a robot car or a perfect grade.
Open the box. Build the thing. Drive it.